Raina Kennedy
Inspire, Enrich, Create
|
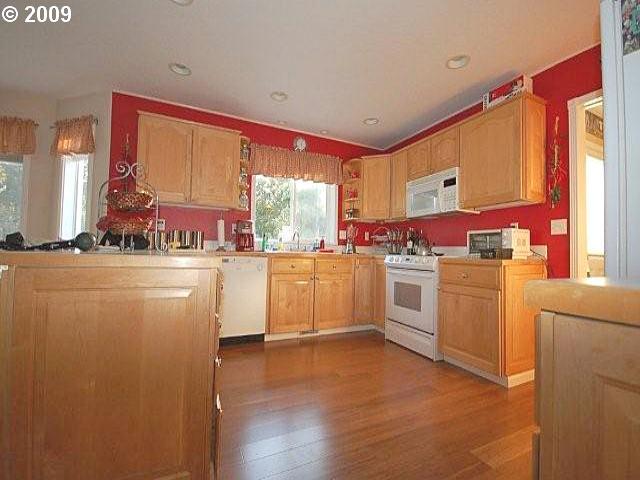
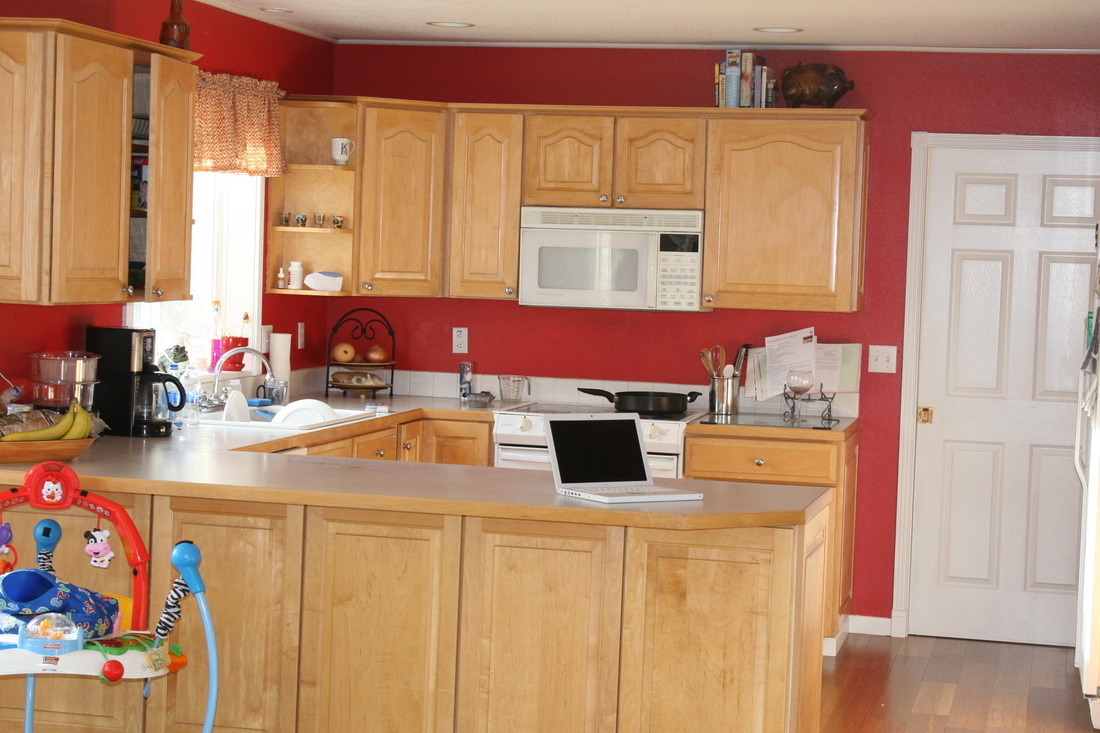
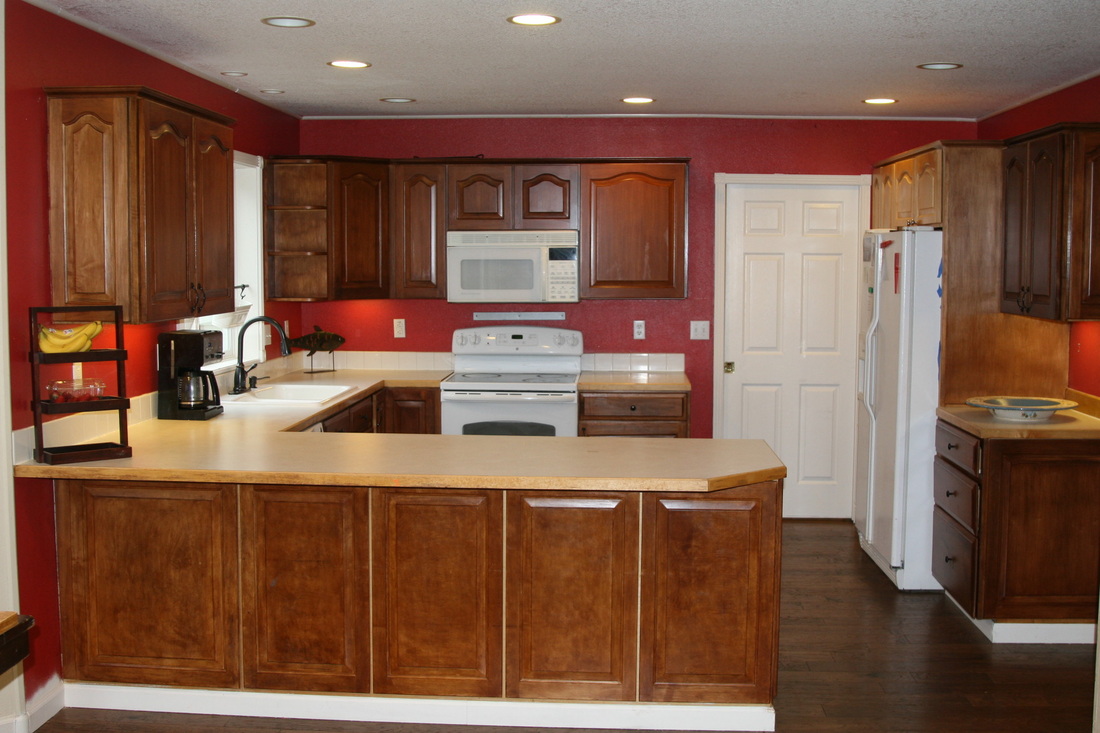
During our Thanks Giving break from kid programs, I decided to refinish our dated cabinets. It's a process but totally worth the work.
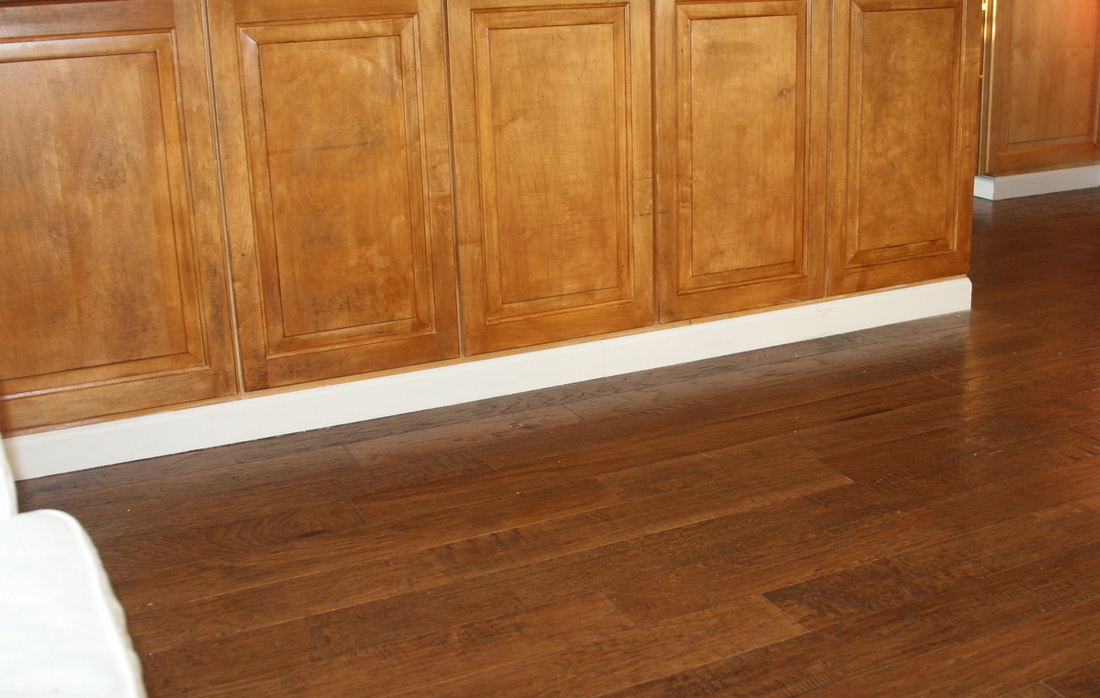 This is just one coat of English Chestnut Stain.  Whenever the kids see me working with tools, they immediately gravitate to the project. Even though it delays the project, I let them help me. It gives me a chance to show them how to work the tool and teaches them how to be handy. I want them to be handy. It's really not a hard project to take on. Simply sand down the surface area of the cabinet, apply 1 coat of stain, let it dry, apply second coat and then polyurethane after the 2nd coat dries. It's just a time consuming project. But there is a definite end in site. You only have so many cabinets ;) With three kids under 5, I try to do a little at a time during their down time. It will take longer to complete but that strategy keeps me stress free and involved with them throughout the day. December 15, 2013Okay- I stand corrected. It is a hard project to take on. Still in the works. Now, I'll need to give more instruction. I had several trials and errors I'd like to share. More to come. SandingThe important thing about sanding is to go with the grain of wood. Just look at the surface and see which way the wood is running. I used a fine surface preparation sand to prepare the surface. It took off the previous finish without leaving apparent scratch marks. Here's the brand I used but you can use any that says Fine Surface Preperation 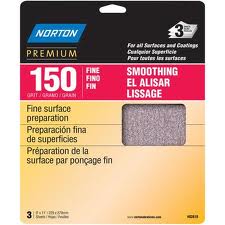 The Stain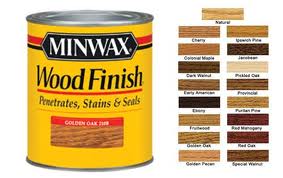 This is the brand of stain I chose. The color I picked is English Chestnut. It looks amazing and is very forgiving. I like this brand because it does penetrate. Use a good quality brush that is specific to staining. It should cost between $10-$15 don't be cheap on this purchase it does make a difference. Prior to staining, make sure you wipe all sanding residue off the surface area. I used baby wipes. A household essential! On your first coat of stain, apply stain and brush strokes with the grain of wood. To remove the excess stain, dab the brush against some paper towels to remove the excess. Keep applying the same strokes with the grain of wood, dabbing each time. Eventually, you will see that the stain has absorbed and you get the wood finish look. Let dry completely at least 2 to 3 days. Your second coat will be the exact same process but you have to be quick on this one. If you let the stain sink in too long it will start to cake a little. I found that its best to apply more on the second coat and work quickly to take it off with the brush and paper dowel dabbing technique. More to come! 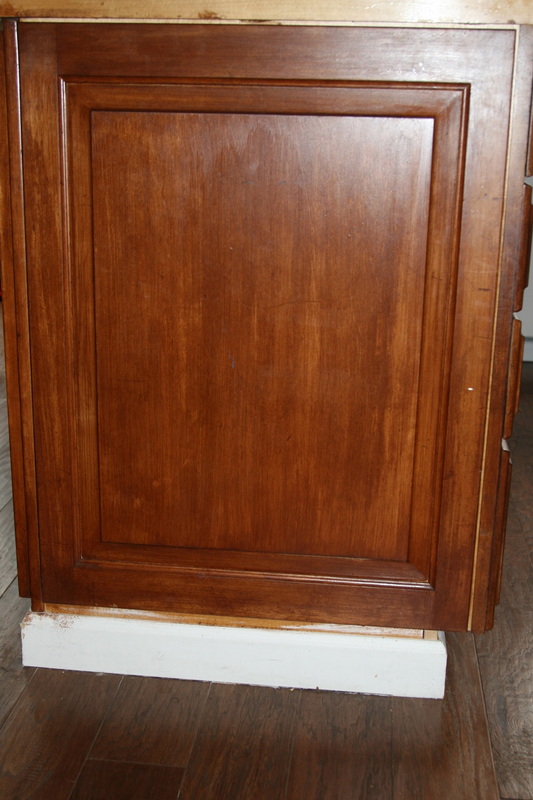 This is an example of how the second coat will cake if you don't apply enough stain at the start of that second coat. The brush starts to remove stain from the First coat. I'll have to re-sand and re-stain this one. This is why I started the dabbing technique to create a marble look. I was afraid of getting this result. Once I figured out how to apply the second coat, they started to look great! 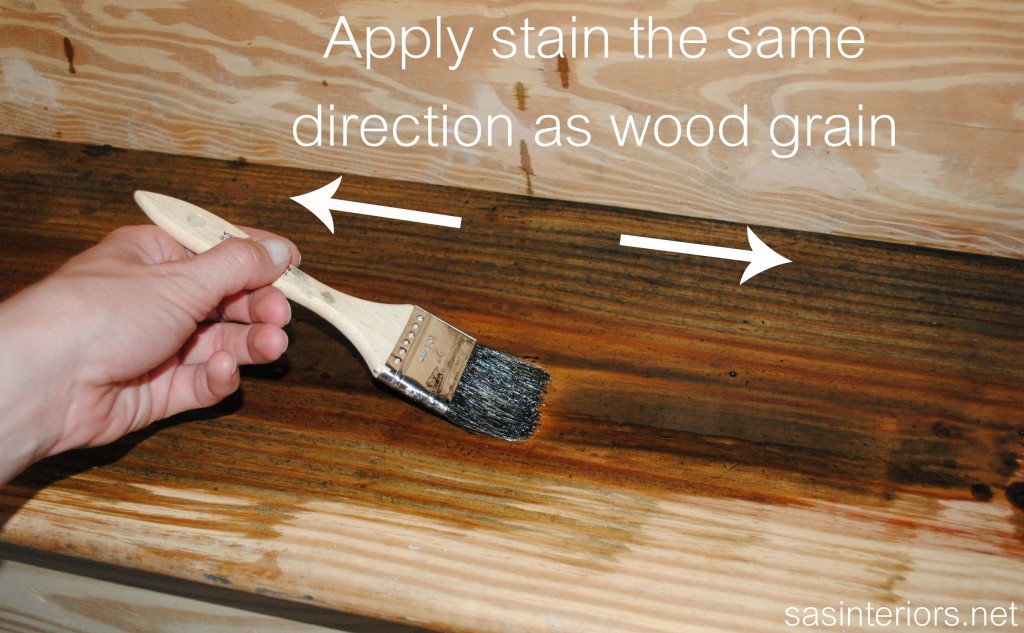 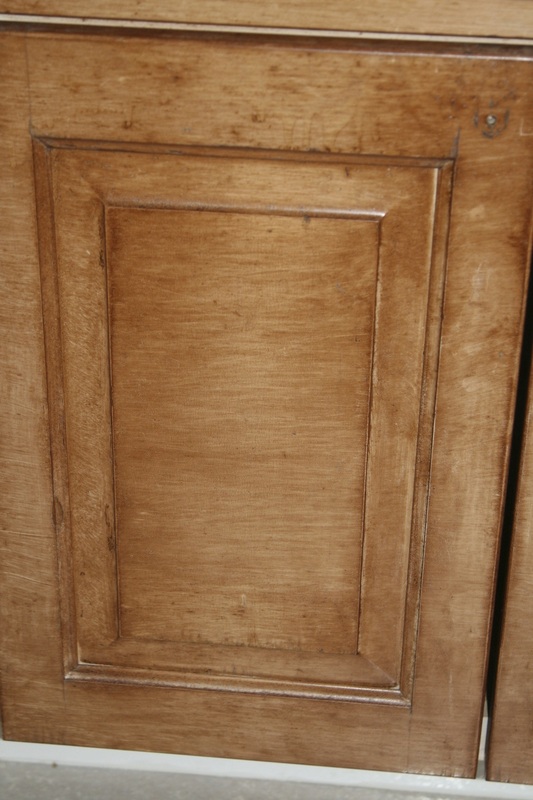 Here's where I went wrong when I first started. I went against the grain of wood and it looked terrible. I also tried to cut corners by not sanding prior to staining. As you can see, sanding is a crucial first step. 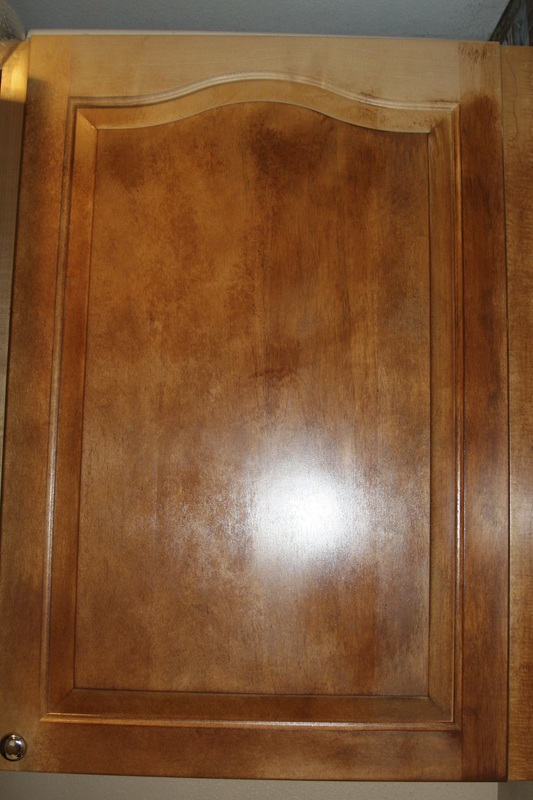 Here's another error. Instead of applying brush strokes in the direction of the wood, I dabbed the stain on to create this marble look. We quickly decided that the brush stroke method looked 1000 times better. 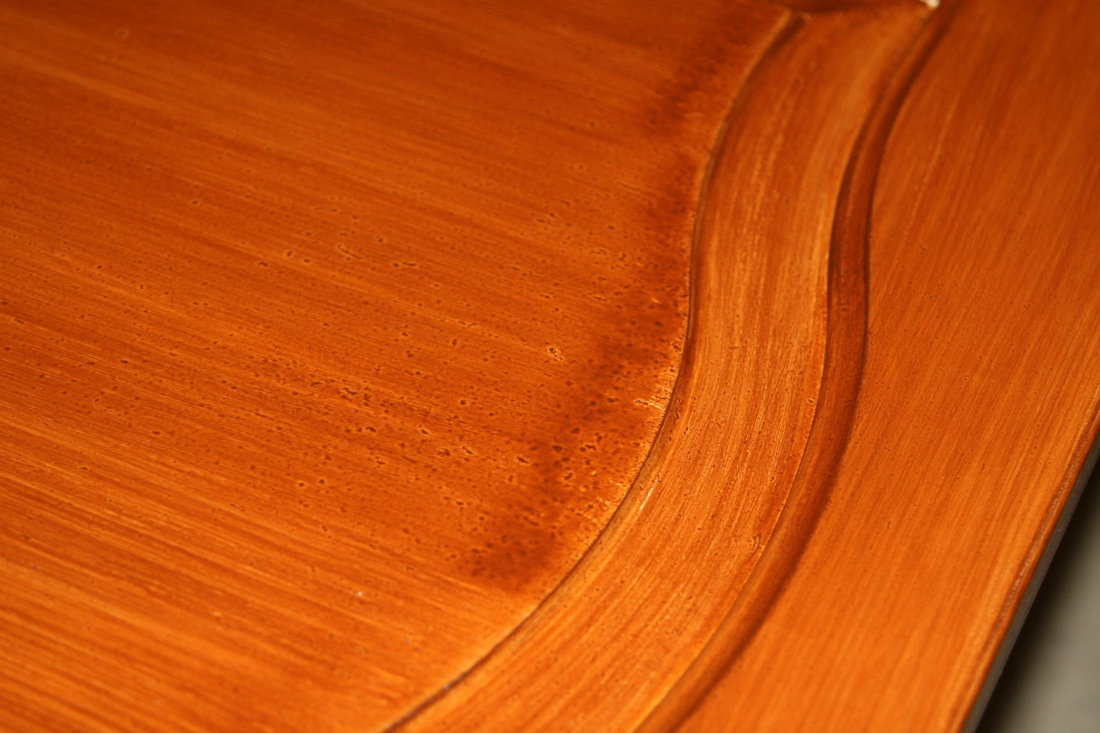 Here's an example of some excess stain that you want to brush out. It's kind of puddling on the surface. When applying brush strokes, make sure you go in both directions (up and down). Each stroke should be in one slow motion. Don't stroke back and forth quickly. 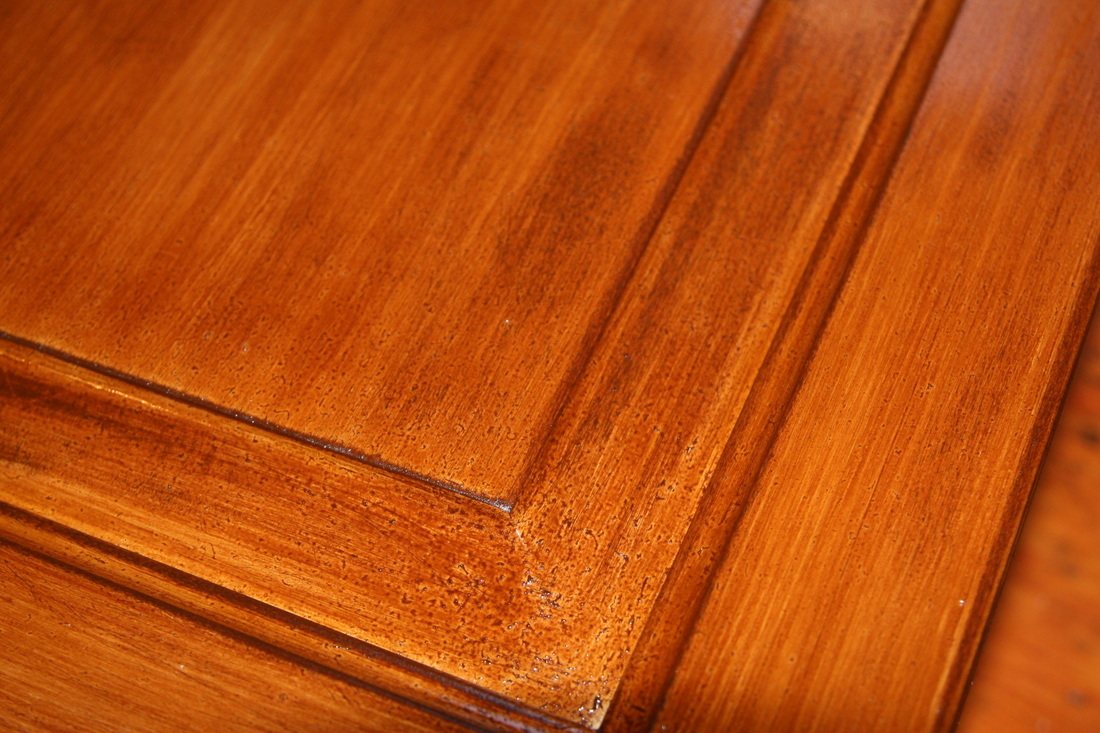 You also want to make sure you brush out any black spots. These happened more during the second coat of stain. I skipped the step of sanding between coats. I think this is a result of that. If you want to add that step, test it out on one first. There is a special sand paper for in-between stain coats. Mine came out fine but I had to make sure I brushed the black spots out. 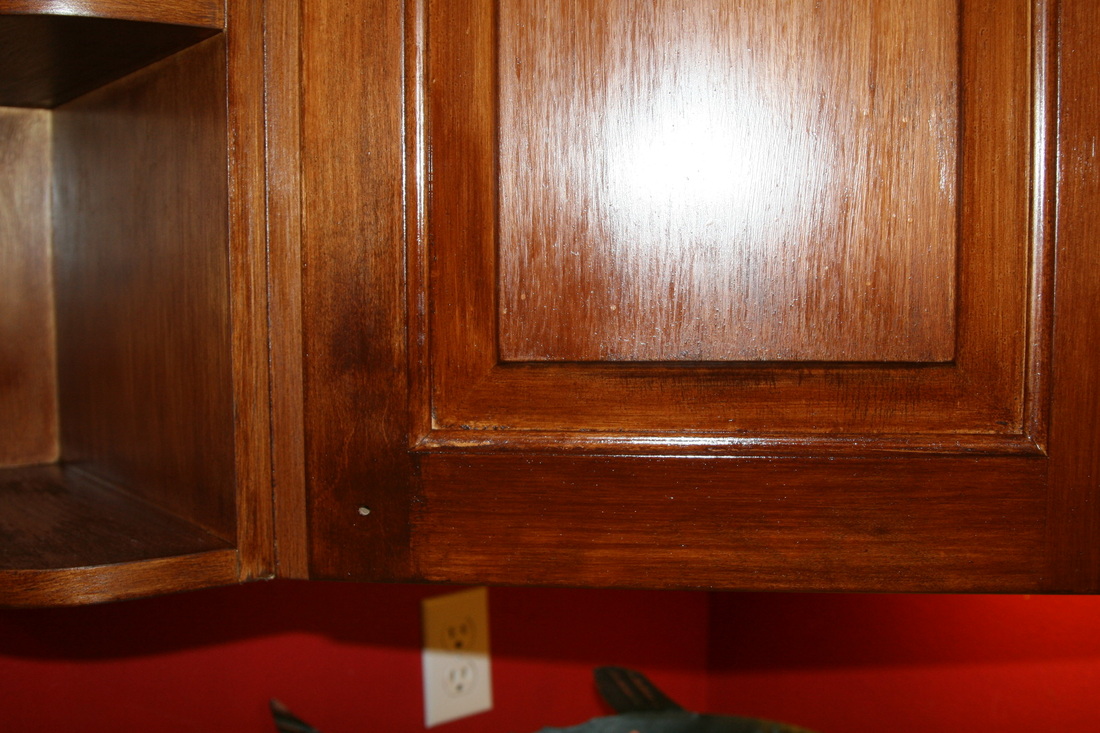 Avoid a third coat of stain. Not sure if this happens with other brands of stain but with this Miniwax (stain, penetrate and seal), the third coat gives a glossy look. Almost as if you tried to paint it instead of stain it. I tried to touch up one area on this cabinet with the 3rd coat and completely ruined it. Now I'll have to sand down and re-stain. The 3rd coat will ruin your project. 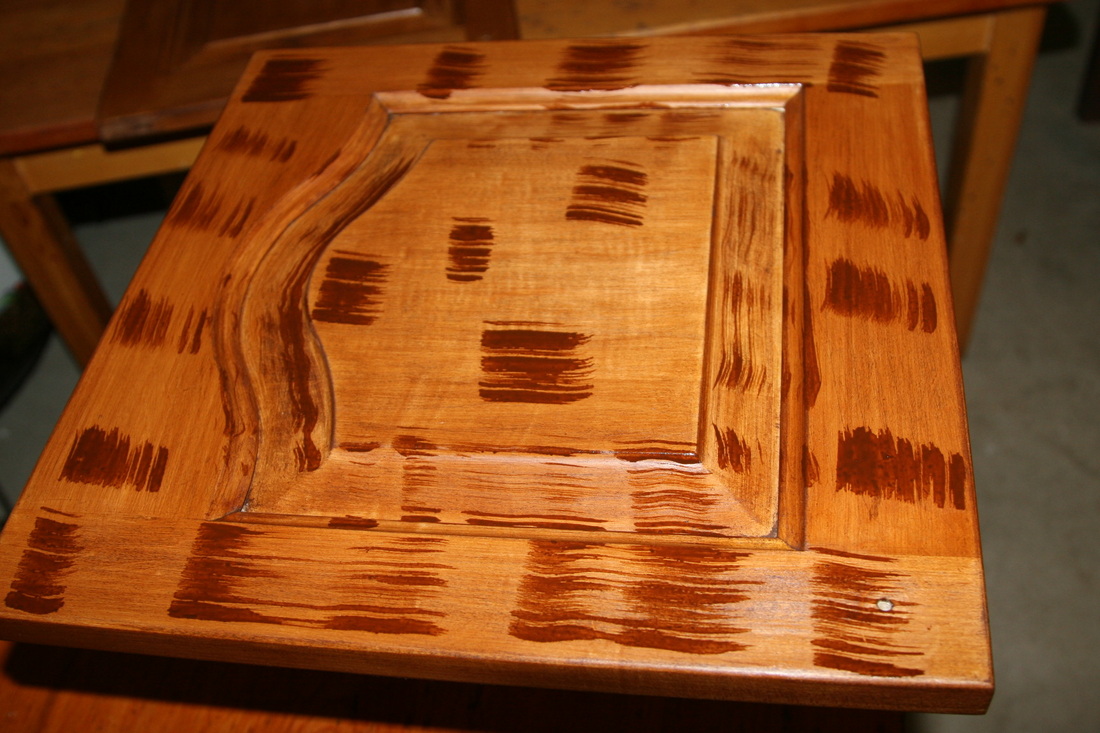 This was my system for applying the stain each time. I dipped the brush into the stain and made short strokes along the entire area so that I didn't have one spot with too much stain on it. After the short strokes, I increased the length of each stroke until the stain covered the entire surface. Next I starting dabbing the brush against paper towels after each stroke to remove the excess on the surface and the excess from the brush.
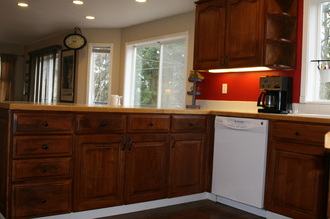
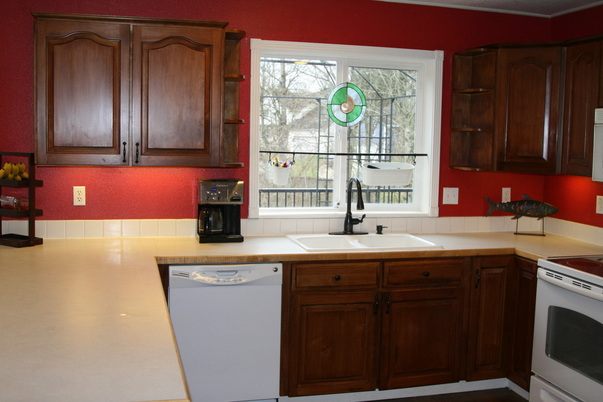 This is what the cabinets will look like when I am finished. We are very happy with the results. 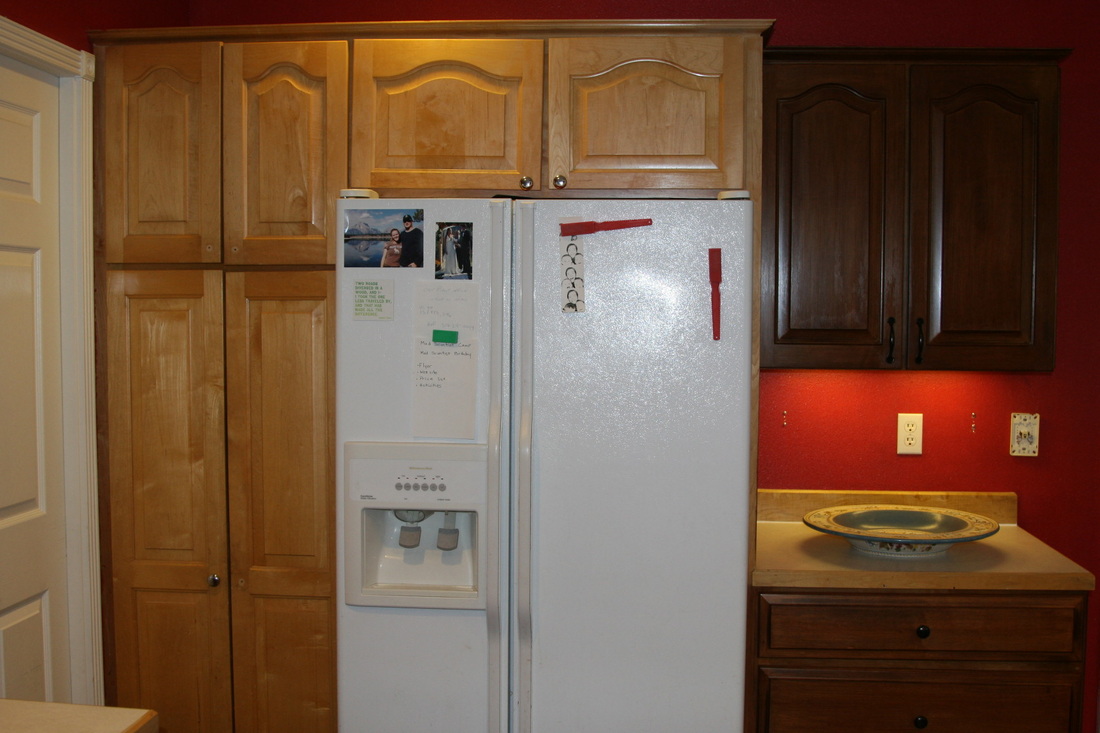 Here's a good look at the difference in each. This is my last section to sand and stain! Polycrylic- The final coat to protect your stain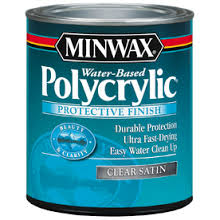 This is the one I used because it didn't wipe off the stain. Some will remove the stain. I also chose clear satin because I personally didn't want a glossy look. This does come in gloss if that's what you like. Note that this is water based. The best part of this process is that it dries within minutes. I applied 2 coats. The second coat after the first dried. Make sure you continue with brushing along the grain of the wood and that you don't leave any puddles. Make sure to pick up a brush that is for polyurethanes for this step. Keep it clean in between paint jobs. The brush needs to stay soft.
0 Comments
Leave a Reply. |

Raina KennedyAuthor Categories
All
|
 RSS Feed