Raina Kennedy
Inspire, Enrich, Create
|
I love re-designing our kids playroom. Our once dining room is now the most active room in the house. Initially, I got drill happy. I attached just about everything to the walls. The room looked amazing and the kids loved playing in it. Here are some of the fun things I created for them.
4 Comments
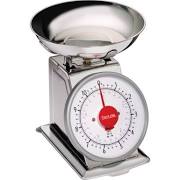
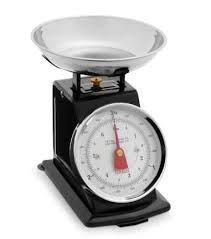
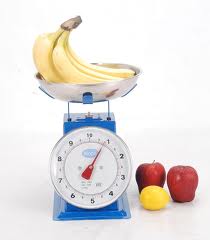
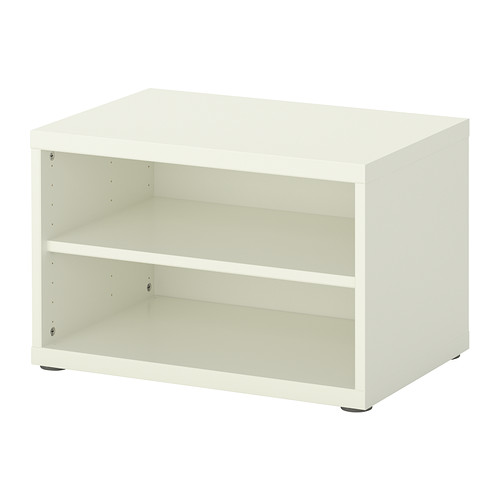
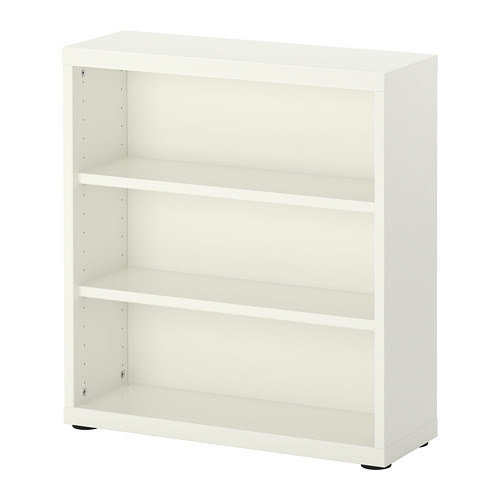
I received this used kid craft clubhouse as a gift from a friend. I just planned to paint it and fix it up a little but once I put on the red and white stripe drapes, the Seuss house was born. Kids houses should be fun and inspiring ;) 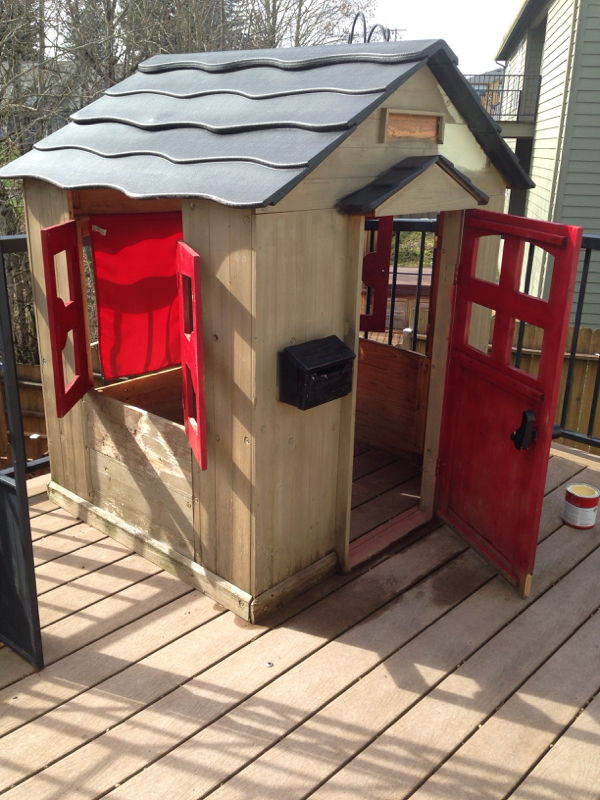 I added these fun test tube flower pots. 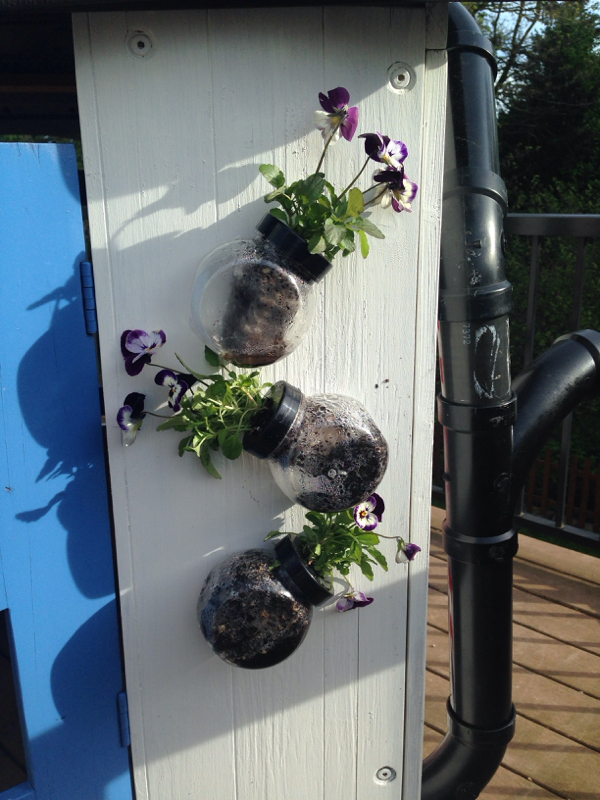 This is a fun way to keep activities on the table and still out of the way. Buckets Built in! It also helps keep loose toys more organized when in use. Here's Charlotte matching her colors and patterns. 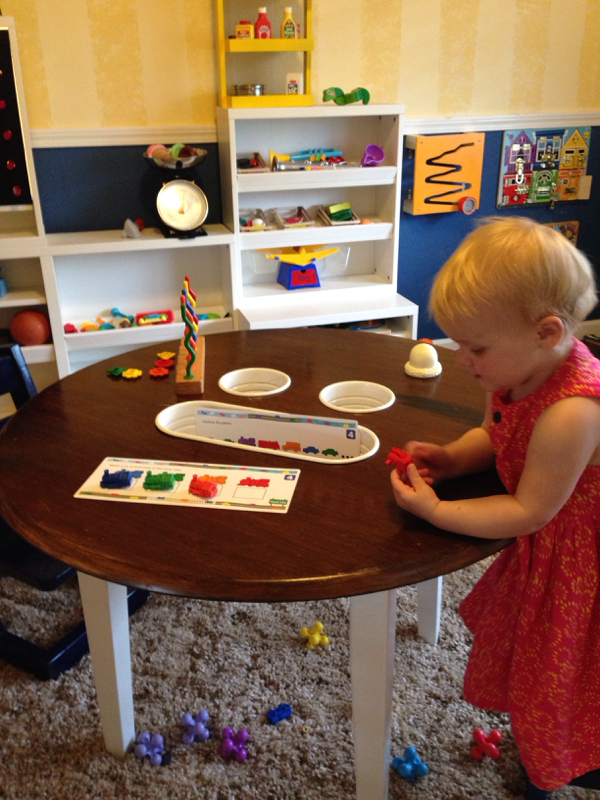 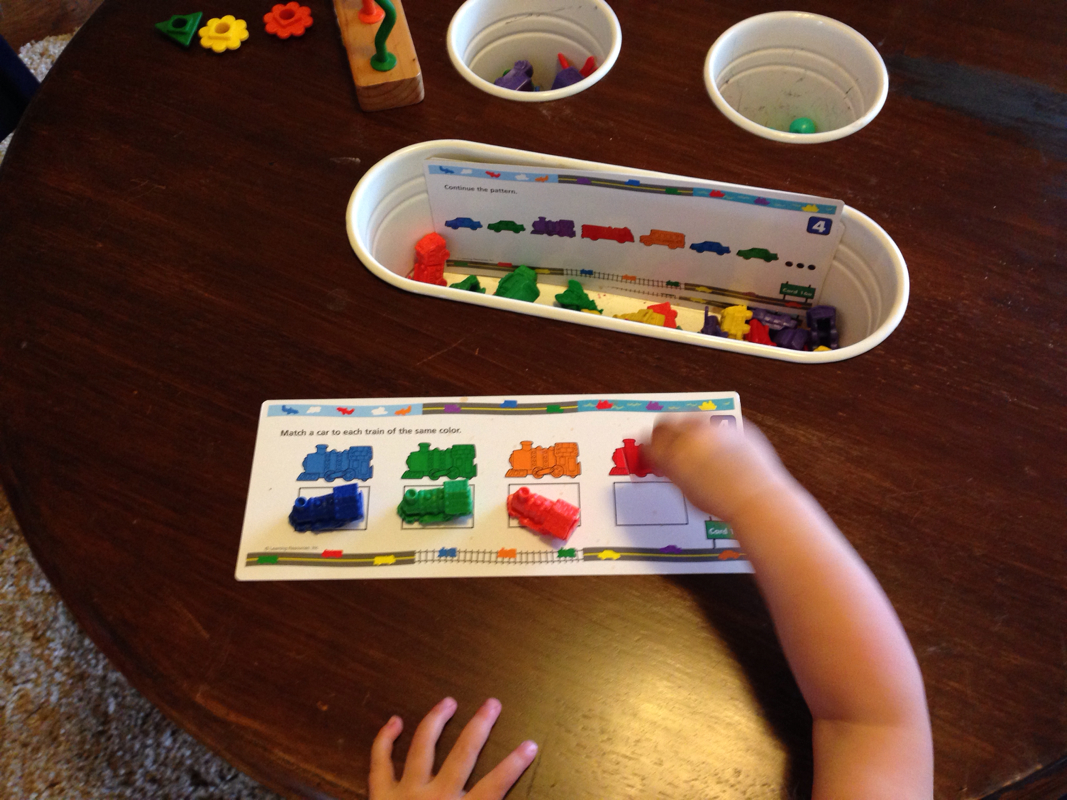 Here's a fun way to turn your windowsill into a Science Lab Station for your kids playroom. I drilled holes into a piece of wood that were the same diameter as the test tubes. I suspended the slat of wood by cutting down two small slats to support it on each side of the windowsill frame. Now the kids have a dedicated area for all their science experiments. As a bonus, it adds to the decor of the room! More importantly, it offers spontaneous play. Instead of having the test tubes stored in cabinets, they are out in plain sight and inspire the kids daily to create fun concoctions.  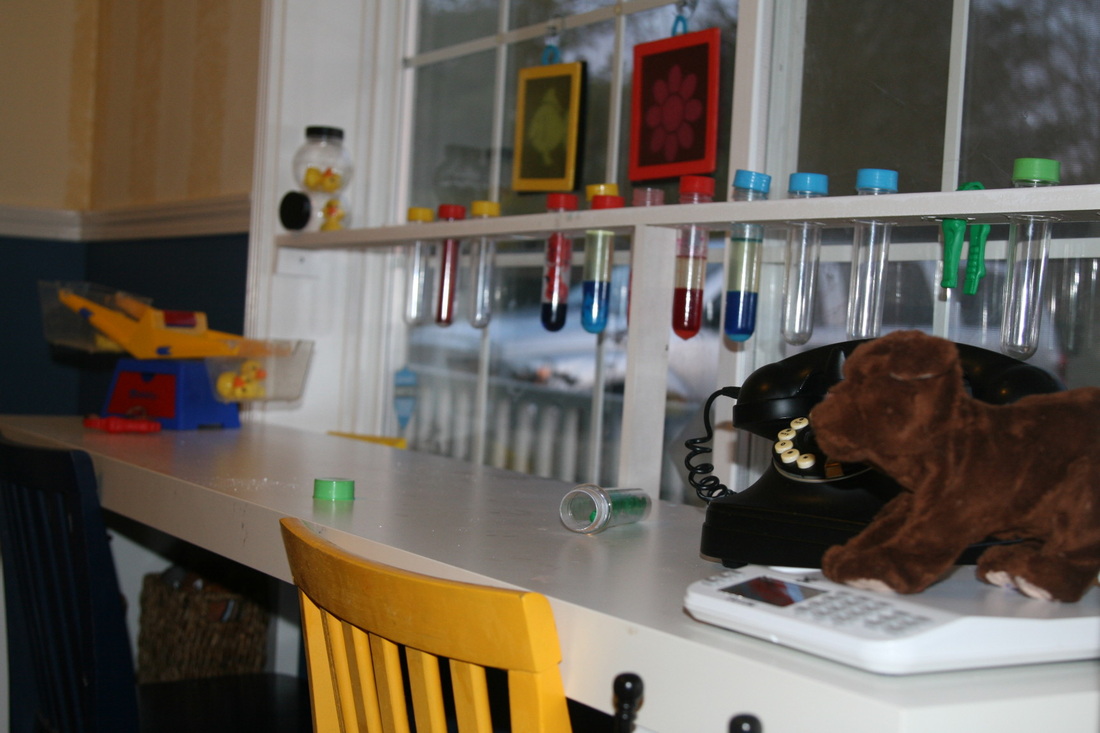 While at our local Children's Museum, our kids were drawn to this fun life size pegboard exhibit. Ever since seeing it, i've been planning to make it for their playroom. It's such a fun addition to our quiet play. I used an Ikea Besta shelf as the base. This was a fun Ikea hack! 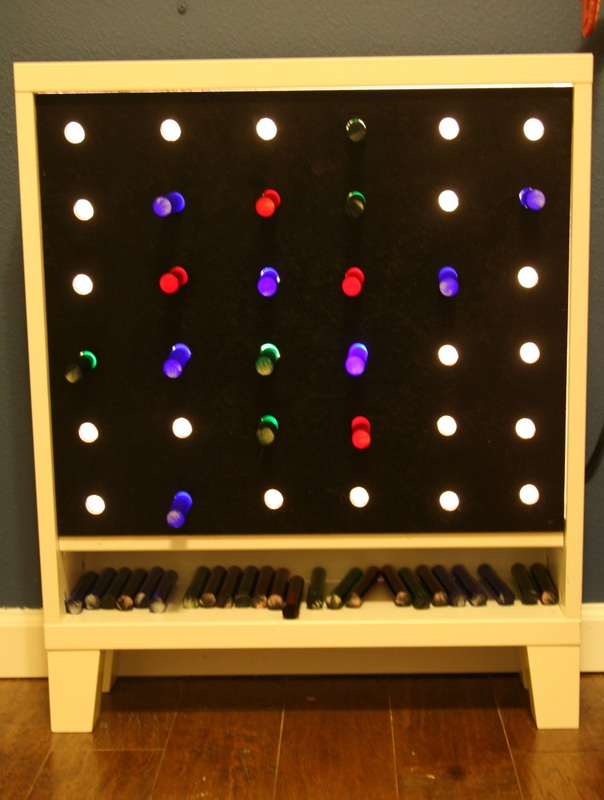 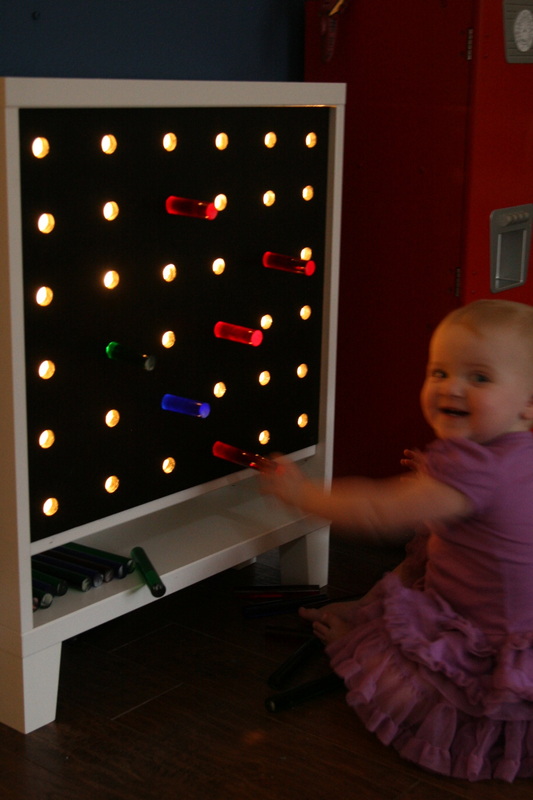  BESTÅ Shelf unit/height extension unit, white $40.00 Article Number: 202.216.56 Size 23 5/8x7 7/8x25 1/4" Our Vet clinic has become such a fun play area for the kids. I found these amazing x-rays online. The company we purchased them from is Roylco. They have so many great science tools and activities for kid play there. I made the x-ray station out of an ikea best shelf. 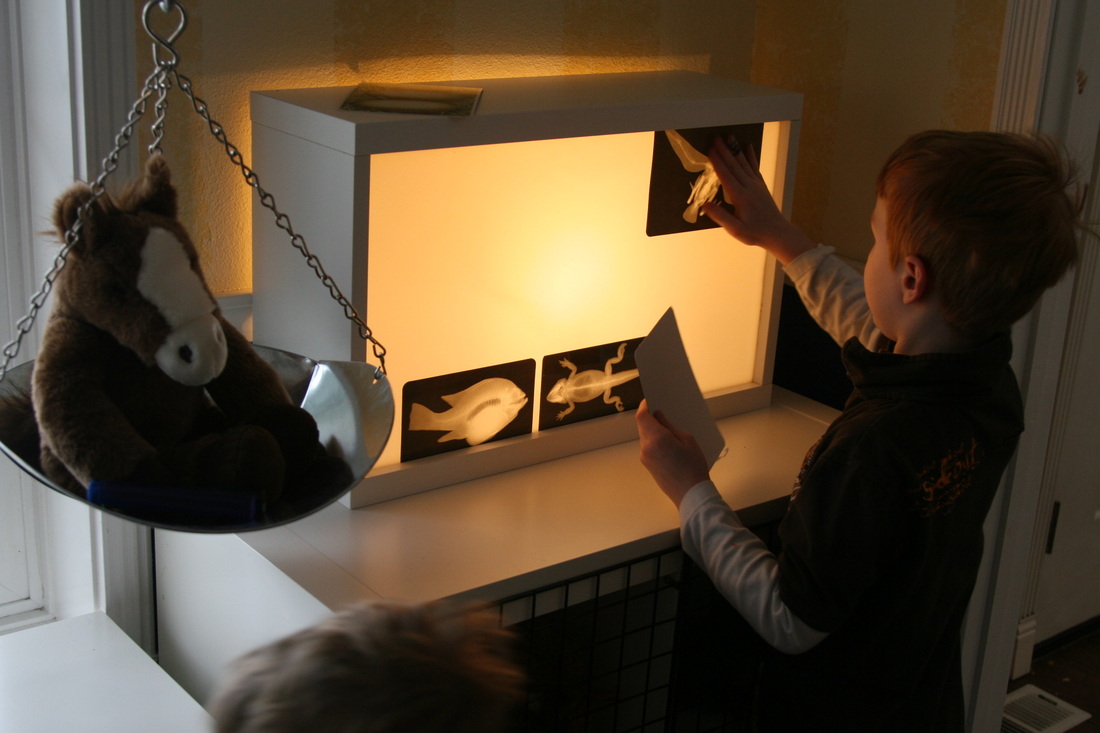 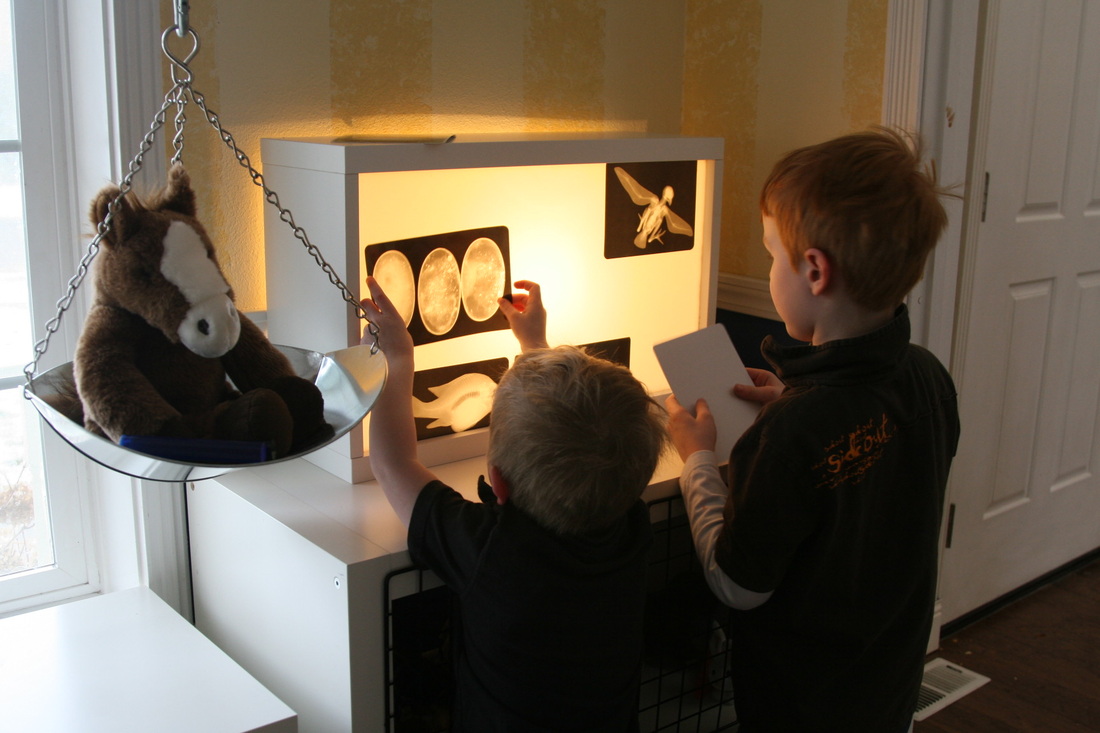 I'm building the kids a Pet Clinic in their playroom. I really wanted to incorporate a kennel area but didn't want to use actual dog kennels. They cost so much and weren't safe for the kids. I'm so happy with the way this came out. It's an Ikea expedit shelf with gates added to the shelf openings. Here's how I did it. 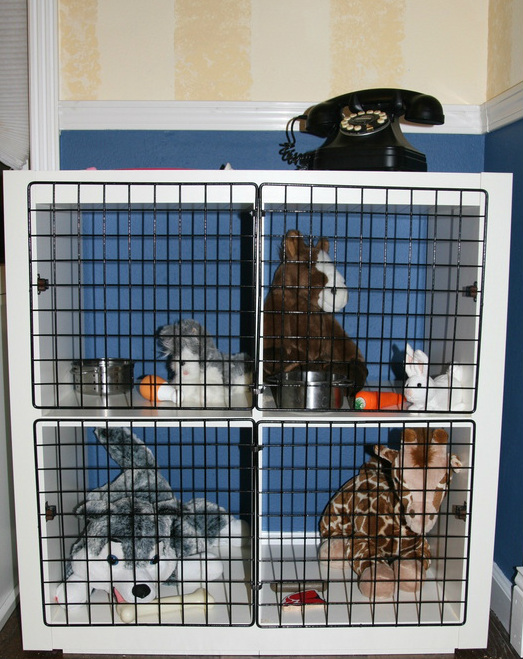 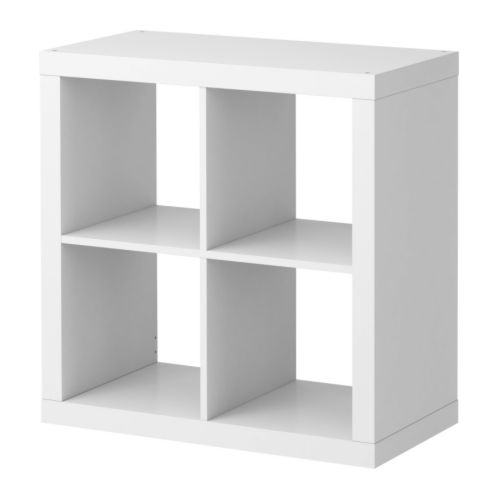 EXPEDIT Shelving unit, white $39.99 Article Number: 201.353.00 Size 31 1/8x31 1/8" 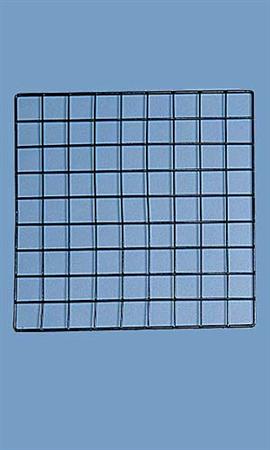 These were the perfect fit to cover the openings of the expedit. Store Supply Warehouse, 14"X14" Mini Grid Panel-Black SKU # 30103 Price:$0.95 each I'm slowly putting our new playroom together. Just found this adorable scale at Walmart for $14! I bolted it to the shelf so it can't be moved. The kids have been putting the entire contents of the house on it! It's proven to be a great learning tool as they discover what's lighter and what's heavier. We also talk about numbers. I love the aesthetic it brings to our market area but even more, I love the educational opportunity it brings to our play. Sometimes, household items make the best toys! 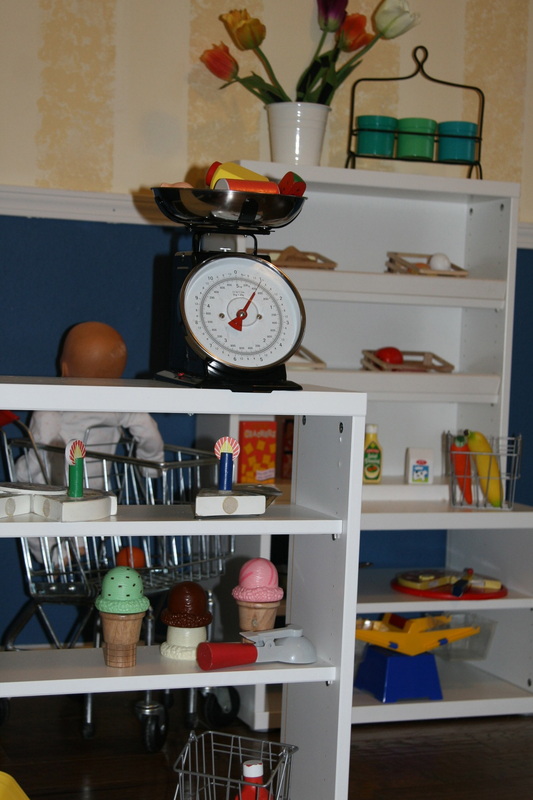
They come in all sorts of fun colors.
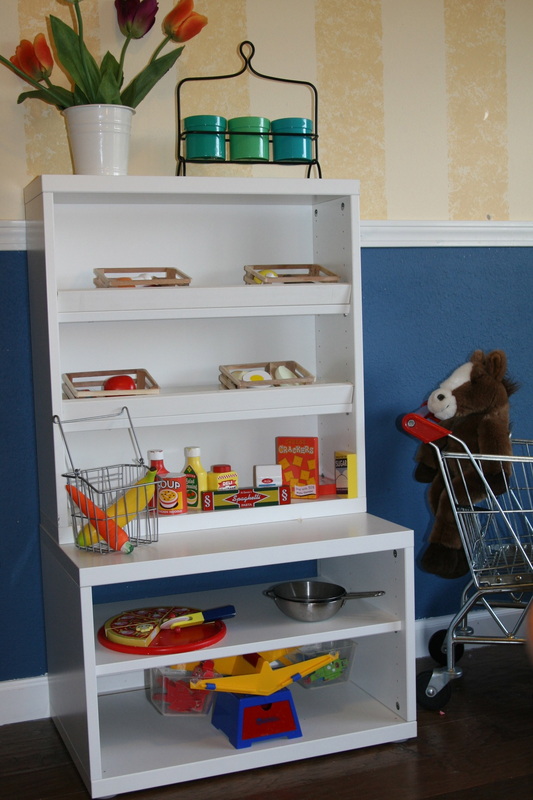 The two shelving units are from Ikea. I added slats at the end of the shelves to get the angled look in most market stands.
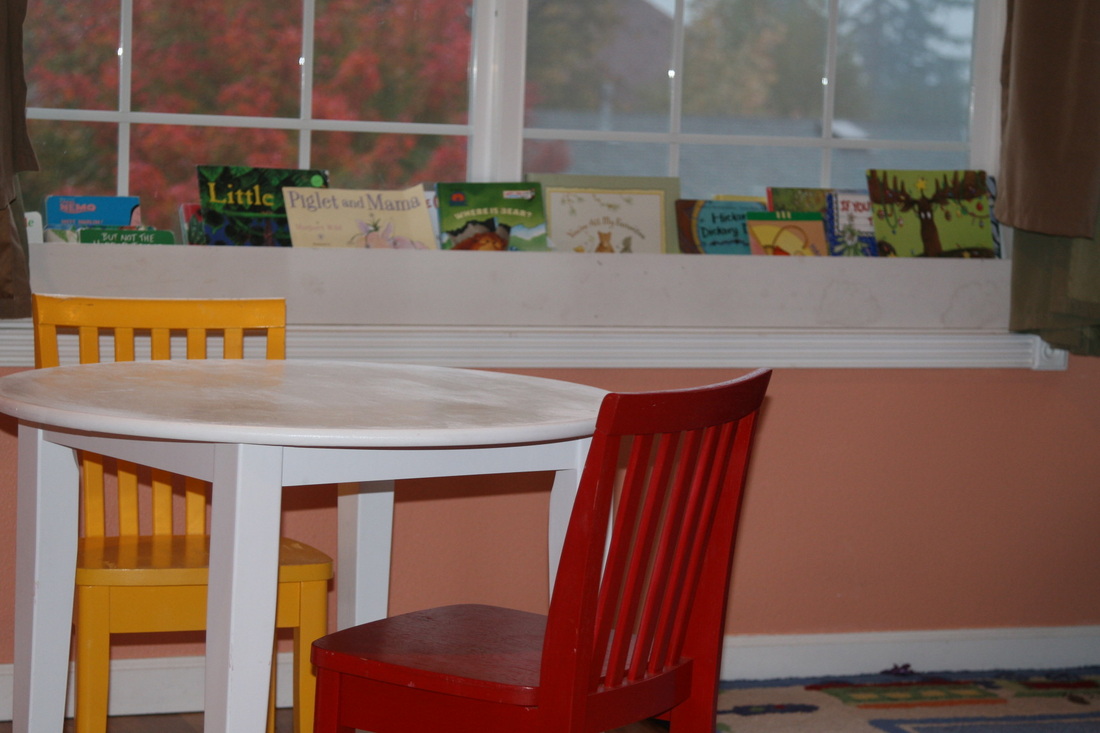
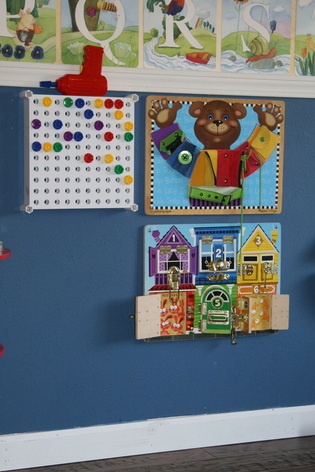
 Use these common toys in an uncommon way. Put them on the wall. They are available for the kids to play with on demand, they add to the decor of the room and it's a great way to keep toys organized. For the bear, I used velcro to attach the puzzle pieces.  Large Picture frames Repurposed as Activity Station for Kids Playroom 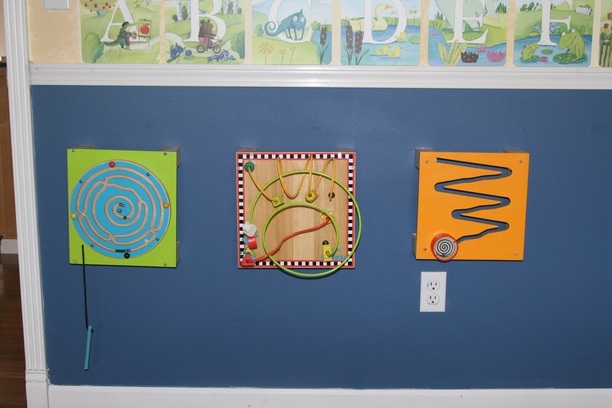 Activity Cubes Repurposed! Deconstruct your activity cube and put it on the wall. Just a paint job away and my window sill book cases will be complete. This was a quick DIY project sure to spruce up and organize your kids bedroom space! I used wide frame molding and L brackets to build. Total cost was $10. 
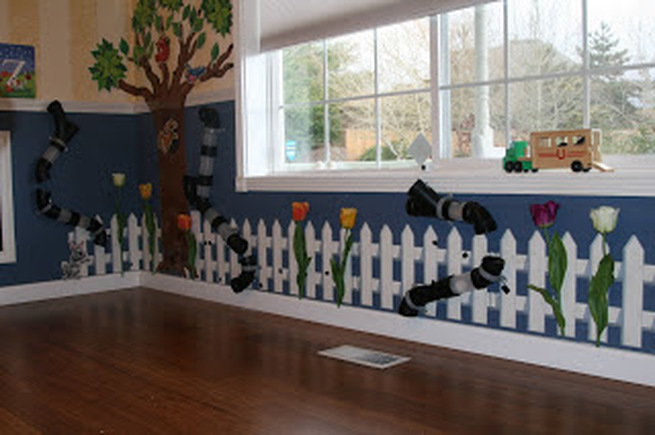
Our kids just love experimenting with gravity and water. I made them these wall and deck activities with a quick stop at our local hardware store. 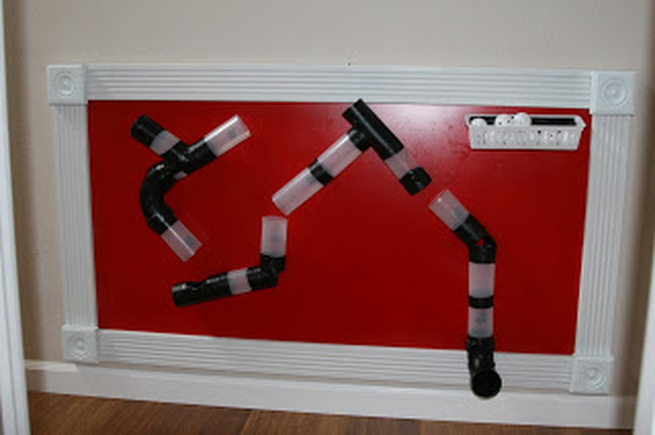 Here's a magnet ball and tunnel system. I picked up a sheet of metal and used base board frames to create the border. The tubes are made of clear ketchup dispensers and fastened together with electric tape. I fastened the magnets to the back and lined the tubes up in various ways to create a fun and interactive play.  I call this tunnel system tulips and tunnels. We combined the clear ketchup bottles with PVC pipes and connectors. The tunnels are attached with grey plastic electrical fasteners. The tulips are attached with velcro so the kids can pick flowers This is a fun and cheap way to inspire the topic of weather and how we dress for it. Found the boy and his clothes at Learning Palace. 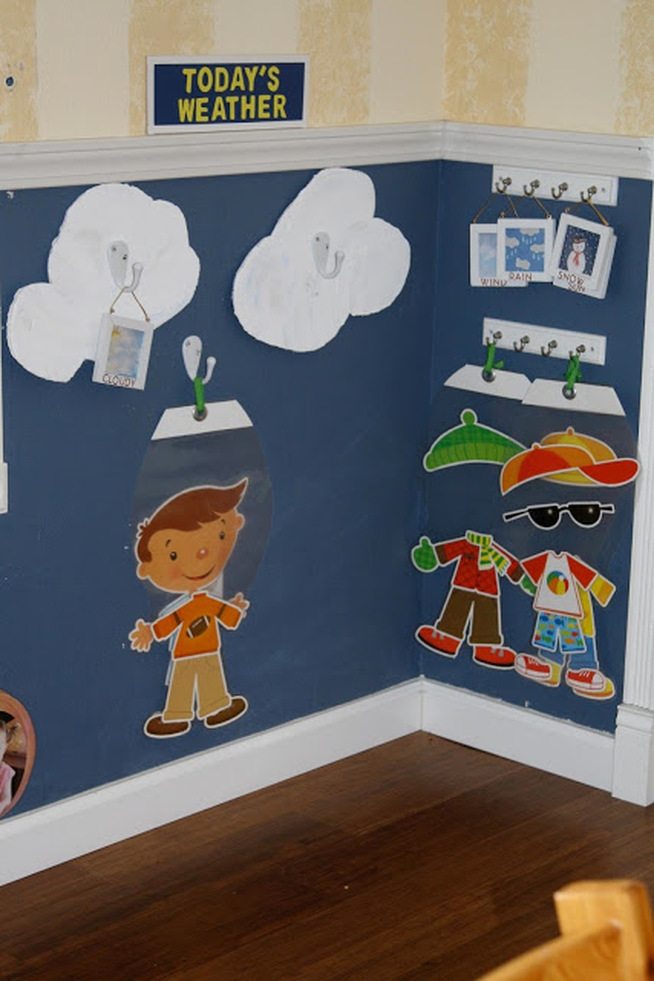 I covered all in clear plastic shelf lining and added rings to hold the string.
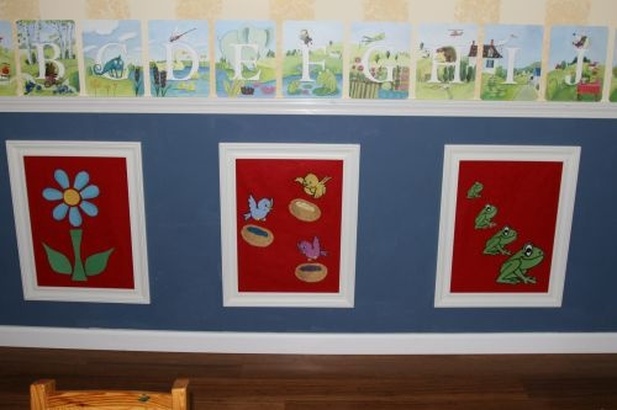
I made the clouds out of cardboard and painted them white. The weather signs are from printouts off the internet and placed them in these cute little frames. We use this everyday! Here's a fun way to organize your play area  Picked up these frames and removed the glass. For the magnet, I cut metal to the size of the frame. You can pick up a sheet from Home depot for close to nothing. I created the chalk board by using chalk paint on the back part of the frame. The last one is a felt activity. Just cut out some felt to the size of the frame and hot glue around the sides. The buckets below catch all the objects suited for each station. I change the felt out weekly to cover new topics of interest. We use the chalk board everyday! This is a fun, cheap and easy way to organize and inspire ! When we bought the house, this was originally the dining room. The white molding separating the yellow stripes from the blue was already in place. I created the book shelf above the frames by using L brackets to suspend a strip of baseboard from the wall. Total cost was $5! 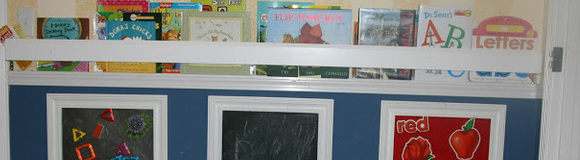 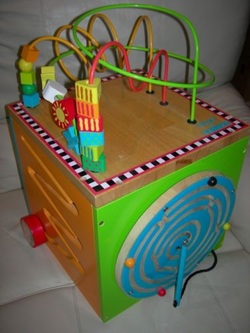 I bought this activity cube at a yard sale for $1. One of the sides were missing an important piece so the owner let it go for close to nothing.  I unscrewed all the sides, cut down a 2x2 beam into four pegs for each side and suspended them on the wall. I used L brackets to support the pegs. They are out of the way and the kids still play with them all the time. Best part is, you can switch them out with other activities cubes of like size!
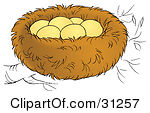
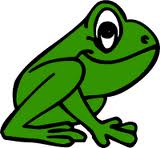
Do it yourself-Felt activities your child will love  This interactive felt activity board is a great addition to any playroom. Not only is it great as room decor but it also serves a rewarding purpose- educating your child. Felt activities are a fun way to learn colors, shapes, numbers, seasons, sizes, sorting and so much more! This learn through play method offers a fun approach to mommy & me learning. After you walk your child through the activity, watch them come back on their own to figure it out over and over again! Here the kids learn how to build a flower, match the bird color to the color of eggs in the bird nest, size up the frogs, build an egg and build a bunny. Here are a few other ideas on how to make learning fun with your child.  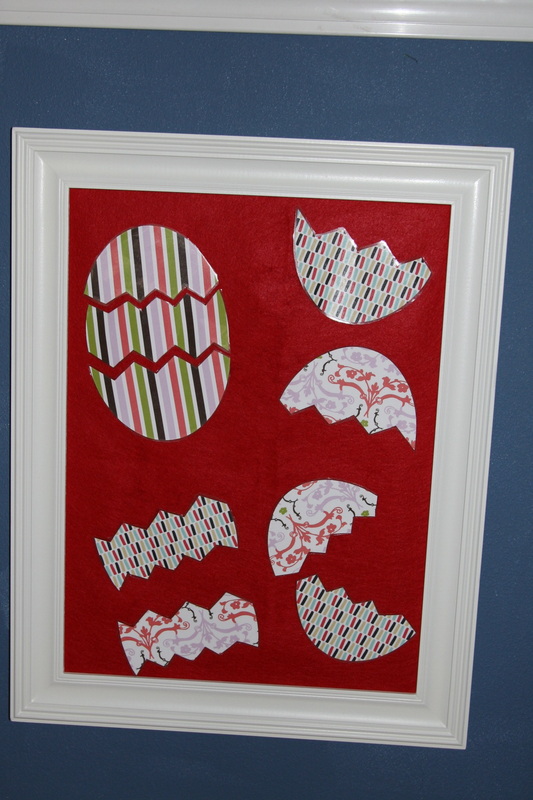 Making a felt activity station: You can buy a frame or use an old one. I used some old frames to create these adorable felt activity walls for the kids. Take out the glass, cut a large piece of felt and glue it to the backboard of the frame. Now you have a fun activity station ready to go for the kids. For the felt activities: just pick up some clear contact paper, print out an image you want to create off the web, wrap in clear contact paper and attach velcro (rough side) to the back of the covered image. I used these images to create a bird and egg color sorting activity Cover all in clear contact paper and place rough side of velcro on back of each.
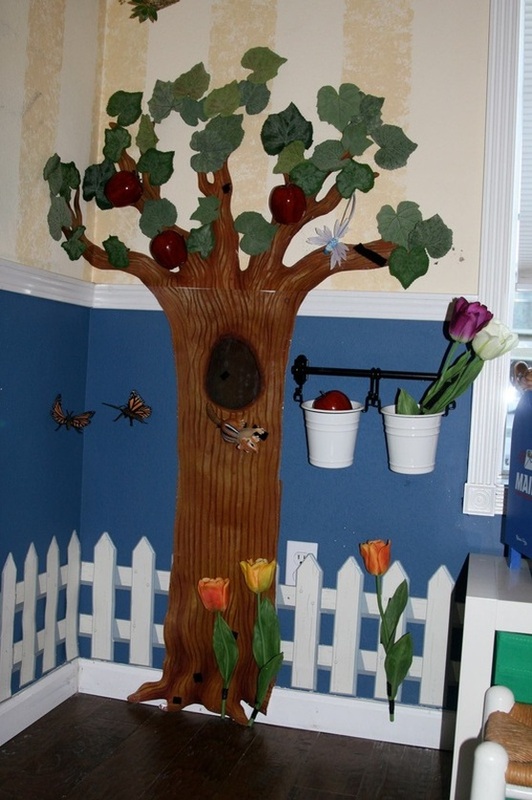
 Our interactive Tree area is taking on a realistic life of its own. 3 years trying to find birds that look real and are play safe. Just found the butterflies and green leaves My favorite thing about this play area is that it suits all three kids perfectly. Charlotte just loves pulling the items off the wall (everything is attached via velcro). Brendan and Liam play together building the scene each day. So sweet to watch and play with. |

Raina KennedyAuthor Categories
All
|


 RSS Feed